Microsoft Teams Whiteboard is just one of the many tools built into the Microsoft Teams experience, which helps today's teams to collaborate and communicate more effectively. Using the whiteboard app within the Teams client, individuals in the modern workforce can bring more context to their discussions with colleagues and customers through sketches and visuals.
As more companies continue to transition to Microsoft Teams as the central hub for workplace discussions, it’s essential to have as many different modes of communication available in this environment as possible. If your traditional meetings often included sketching ideas and drawing on a physical whiteboard, it only makes sense to recreate that experience in a digital environment.
Today, we’re going to introduce you to the features and functionality of the Microsoft Teams whiteboard and offer a step-by-step guide on how to use this feature.
The Microsoft Teams Whiteboard: What is it?
The Microsoft Whiteboard web app powers the whiteboard available for collaborative sketching in Microsoft Teams. This app allows Teams meeting participants with access to the whiteboard to sketch, draw, and write together on a free-form, digital canvas.
Users can share whiteboards so everyone in the Teams meeting can access the canvas and contribute their ideas. You can also download and save content from the Whiteboard.
The Microsoft Teams Whiteboard is available to anyone with Microsoft Teams. If you don’t have access to it within your meetings, you might need to speak to your Teams admin to ensure your application is up-to-date and has correct permissions.
How to Use the Microsoft Teams Whiteboard
Provided you have the latest version of Microsoft Teams; you should be able to access the whiteboard within your Teams app. Navigate to the left-hand side menu, and click on the “Calendar” icon, to start a meeting. You can click on the “+New Meeting” button to configure your meeting, adding anyone you want to be part of the collaborative session.
You’ll need to wait until the meeting starts to access the whiteboard. Once the meeting begins, Microsoft Teams will prompt you to join the conversation, click the “Join” button, set your computer/phone audio and video settings, then click “Join Now”.
Within the meeting, click on the “Share Tray” icon. A window should appear showing the “Microsoft Whiteboard” button. Click this button to begin your whiteboarding session. Everyone in the meeting should be able to see the whiteboard. However, you can decide whether you want everyone in the meeting to be able to collaborate on the board or whether you want to be the only person to draw.
How to Draw on the Microsoft Teams Whiteboard
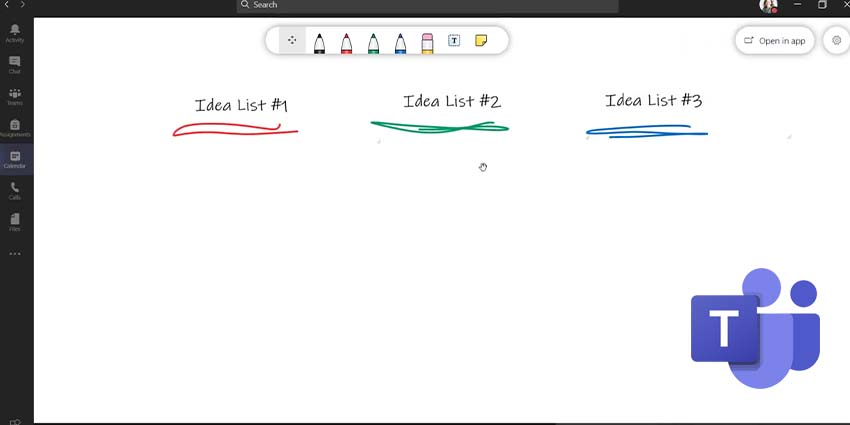
The Microsoft Teams whiteboard is relatively easy to use. After the white canvas loads on your Teams screen, you should see a writing tool pad. Click anywhere on the white screen to load the toolbar. The toolbar will include pens of varying thickness, a sticky note, an eraser, a text box, and a shape/ line tool.
Select the drawing utensil you want to use and click on the canvas to start drawing. If you have a touchscreen, you should be able to draw with a stylus or your finger. You can drag your cursor or finger anywhere on the whiteboard to sketch out whatever you like. You’ll also have the option to select the text box and place it anywhere on the screen to add written content to your canvas.