Building the perfect Microsoft Teams Room environment for your hybrid workforce means ensuring you have the right software in place and the correct hardware.
While Microsoft Teams can give companies all the software solutions, they need for video conferencing, content sharing, and more, incredible conferencing experiences rely on your ability to access the correct devices. For many companies, this includes the use of “Panels”.
Simple but effective devices for controlling your Microsoft Teams environment through the Microsoft Teams Rooms app, “panels” are often placed outside meeting spaces, next to the entrance. Let’s explore everything you need to know about Teams panels.
What are Microsoft Teams Panels?
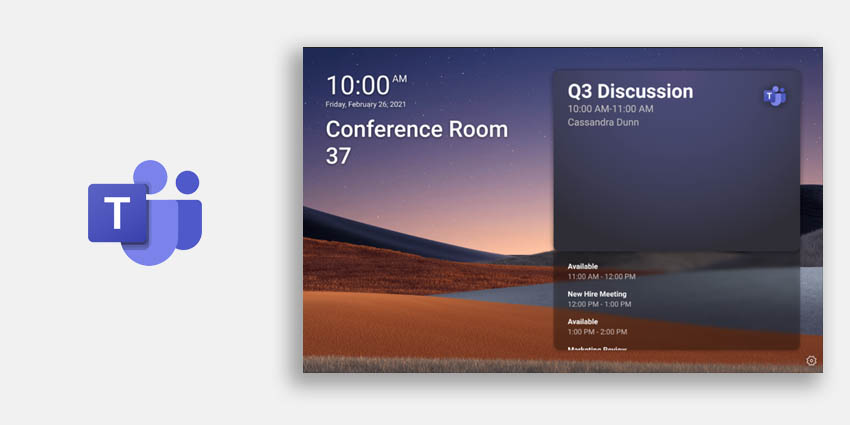
Often placed outside a meeting room, panels display all the meeting details scheduled via Outlook 365 or Teams calendaring applications. The solutions prominently display meeting details, so attendees can confirm if they’re in the right place for their meetings.
Microsoft Teams panels support a range of features, including:
- Display of meeting space details: Panels provide quick information about meeting spaces, including their availability and location. You can also see key meeting details like the title of a meeting, meeting schedules, and who is responsible for organising each meeting.
- Availability status: Colour coded indicates display meeting room availability status immediately. This ensures users can tell from anywhere whether a meeting space is reserved or available to use without speaking to an admin.
- Reservations: If a meeting room is available, you can use your Microsoft Teams panels to reserve the space instantly for an ad-hoc meeting. You can even join the meeting from the in-room Teams or Surface hub devices.
- Accessibility: Microsoft Teams panels come with various accessibility features, including high-contrast text and customisations, so anyone can easily see the information they need about a meeting straight away.
- Customisation: To ensure your panels match your brand, administrators can change the default look of their panels within the settings. You can add your own background wallpaper and change the colour of the “busy” indicator.
Teams Panels: Requirements and Licenses
Microsoft works with many leading brands to deliver exceptional functionality to companies in need of Teams panels. At the time of writing, there are five certified panels available, including:
- Logitech TAP scheduler
- Yealink RoomPanel
- Crestron TSS-1070
- Crestron TSS-770
- Neat Pad panel
Each panel will come with specific hardware, software, and network requirements to consider when deploying your technology, so it’s worth speaking to the manufacturer about your needs. On the plus side, from a Microsoft Teams perspective, you should only need a Teams Rooms standard license to get started.
To choose your Microsoft Teams panels, you may want to look at some of the devices on offer. The above-certified solutions are designed to work specifically with Microsoft Teams, so you can rest assured that they’ll give you a great meeting experience. However, you may also want to think about whether you can integrate these devices with other hardware you might be using.
Microsoft does recommend creating a resource account for managing your Microsoft Teams panels hardware in advance of your actual installation date. A good tip is to name your resource accounts, so you know what you’re using each one for.
How to Use Microsoft Teams Panels
Like most Microsoft Teams tools, Microsoft Teams panel solutions are designed to be convenient and easy to use. The first step in leveraging your technology is procuring the right panel for you. Microsoft recommends taking an inventory of the bookable meeting spaces in your business landscape during this stage to decide how many panels you need and what additional hardware might be necessary.