
Microsoft Teams is among the most popular chat-based collaboration platforms in the world. As of January 2022, it had 270 million monthly active users. One reason Teams has proved so popular is its wide range of functionalities. In addition to a simple chat, voice, and video interface, users can also install various applications that help in their daily tasks. In other words, Teams offers a complete collaboration experience, enhanced by the extensive controls available during Teams meetings.
While almost every video conferencing tool supports screen sharing, Teams also lets users transfer the control of a screen to another meeting participant.
Sharing Screens in Microsoft Teams: A Full-Featured Experience
The screen sharing capability in Teams allows users to share their entire screen (applications, tabs, desktops, etc.), a particular window, a PowerPoint presentation, or a Microsoft-provided whiteboard. In addition to simply sharing the screen with others, one can also transfer control so that another meeting participant can make changes on the user’s desktop.
In addition to the person presenting or sharing their screen, anyone can ask for sharing controls during the meeting.
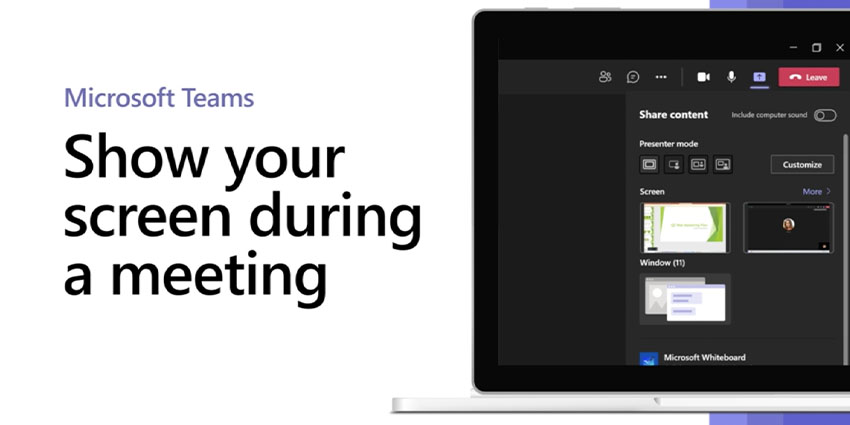
The sharing experience in Teams includes the following key features:
- Using desktop sharing, you can show your entire screen, notifications, and other desktop activities
- Window mode lets you display one window only, with no notification or other activity on the desktop
- If you choose the PowerPoint presentation option, others can interact with a PowerPoint file
- In the Whiteboard mode, users can collaborate with others in real-time
- Teams allows you to share computer sound with meeting participants. It is a great way to play a video or audio clip for presentations
- You can give control to another meeting participant if you want them to change a file, help you present, or demonstrate something. In this case, you are both in control of the sharing, and you can reclaim control
How to Share Screens in Microsoft Teams? Guide for Admins
Administrator permissions are a prerequisite when sharing screens or screen controls with others. Admins can activate these options from the Microsoft Teams admin center.
- In the Microsoft Teams admin center, go to Meetings and then go to Meeting policies.
- In the Meeting policies section, select Add.
- Give your policy a unique title and a short description.
- Pick a screen-sharing mode from the Content sharing drop-down menu.
- Click one of the following settings to turn it on or off:
- Allow a participant to give or request control
- Allow an external participant to give or request control (a per-user policy)
- Allow PowerPoint sharing
- Allow whiteboard
- Allow shared notes
- Then click Save
Remember that the Allow an external participant to give or request control setting must be toggled to “on” if users are to share screen control during meetings.
How to Share Screen Control in a Microsoft Teams Meeting?
Select the Share content button in your meeting controls to share your screen in a meeting. Then, choose to present your entire screen, a window, a PowerPoint file, or a whiteboard. This will activate the sharing toolbar, which appears on the top of the meeting window. Once the toolbar is visible, follow these steps to share screen control with another meeting participant.
- Select Give control from the sharing toolbar.
- Enter the individual’s name to whom you want to delegate authority.
- Microsoft Teams notifies that individual that you’re sharing control. While you share control, they can make selections, revisions, and other changes to the shared screen.
- To regain control, choose Take back control.
Besides the host or presenter, a meeting participant can also ask to take control. To use this feature, someone else should already be sharing their screen so that you can control what happens on their desktop environment. Here are the steps:
- You may request control from another user by clicking the Request control button.
- You may then ask the sharing individual to accept or reject your request.
- When you have control of the shared screen, you may select objects, edit elements, and make other changes, which will be visible to all meeting participants.
- To end the control sharing, choose the Release control option.
What Else Can You Do with the Screen Sharing Feature?
Sharing content via one’s screen is available on the Teams desktop app, Chrome and Microsoft Edge browsers, and Mac PCs. Keep in mind that Mac devices may require a modification to your privacy settings before you can share your screen on Teams. If you are sharing your screen from the Teams mobile app, the platform allows you to add a device to a meeting so that users can attend the session from two devices simultaneously. This way, you can use one device to share content and the other for regular audio and communication.
When a screen is being shared, the person in control can zoom in and out using the Ctrl + plus/minus keys to make the content more clearly visible or emphasize a particular portion. This capability is useful when sharing whiteboards, including a variety of rich media content.
The ability to share screen control makes it much easier to co-conduct a session – for example, a webinar or an employee training event. Multiple meeting participants can work together and collaboratively present content, without requiring third-party integrations or add-ons.